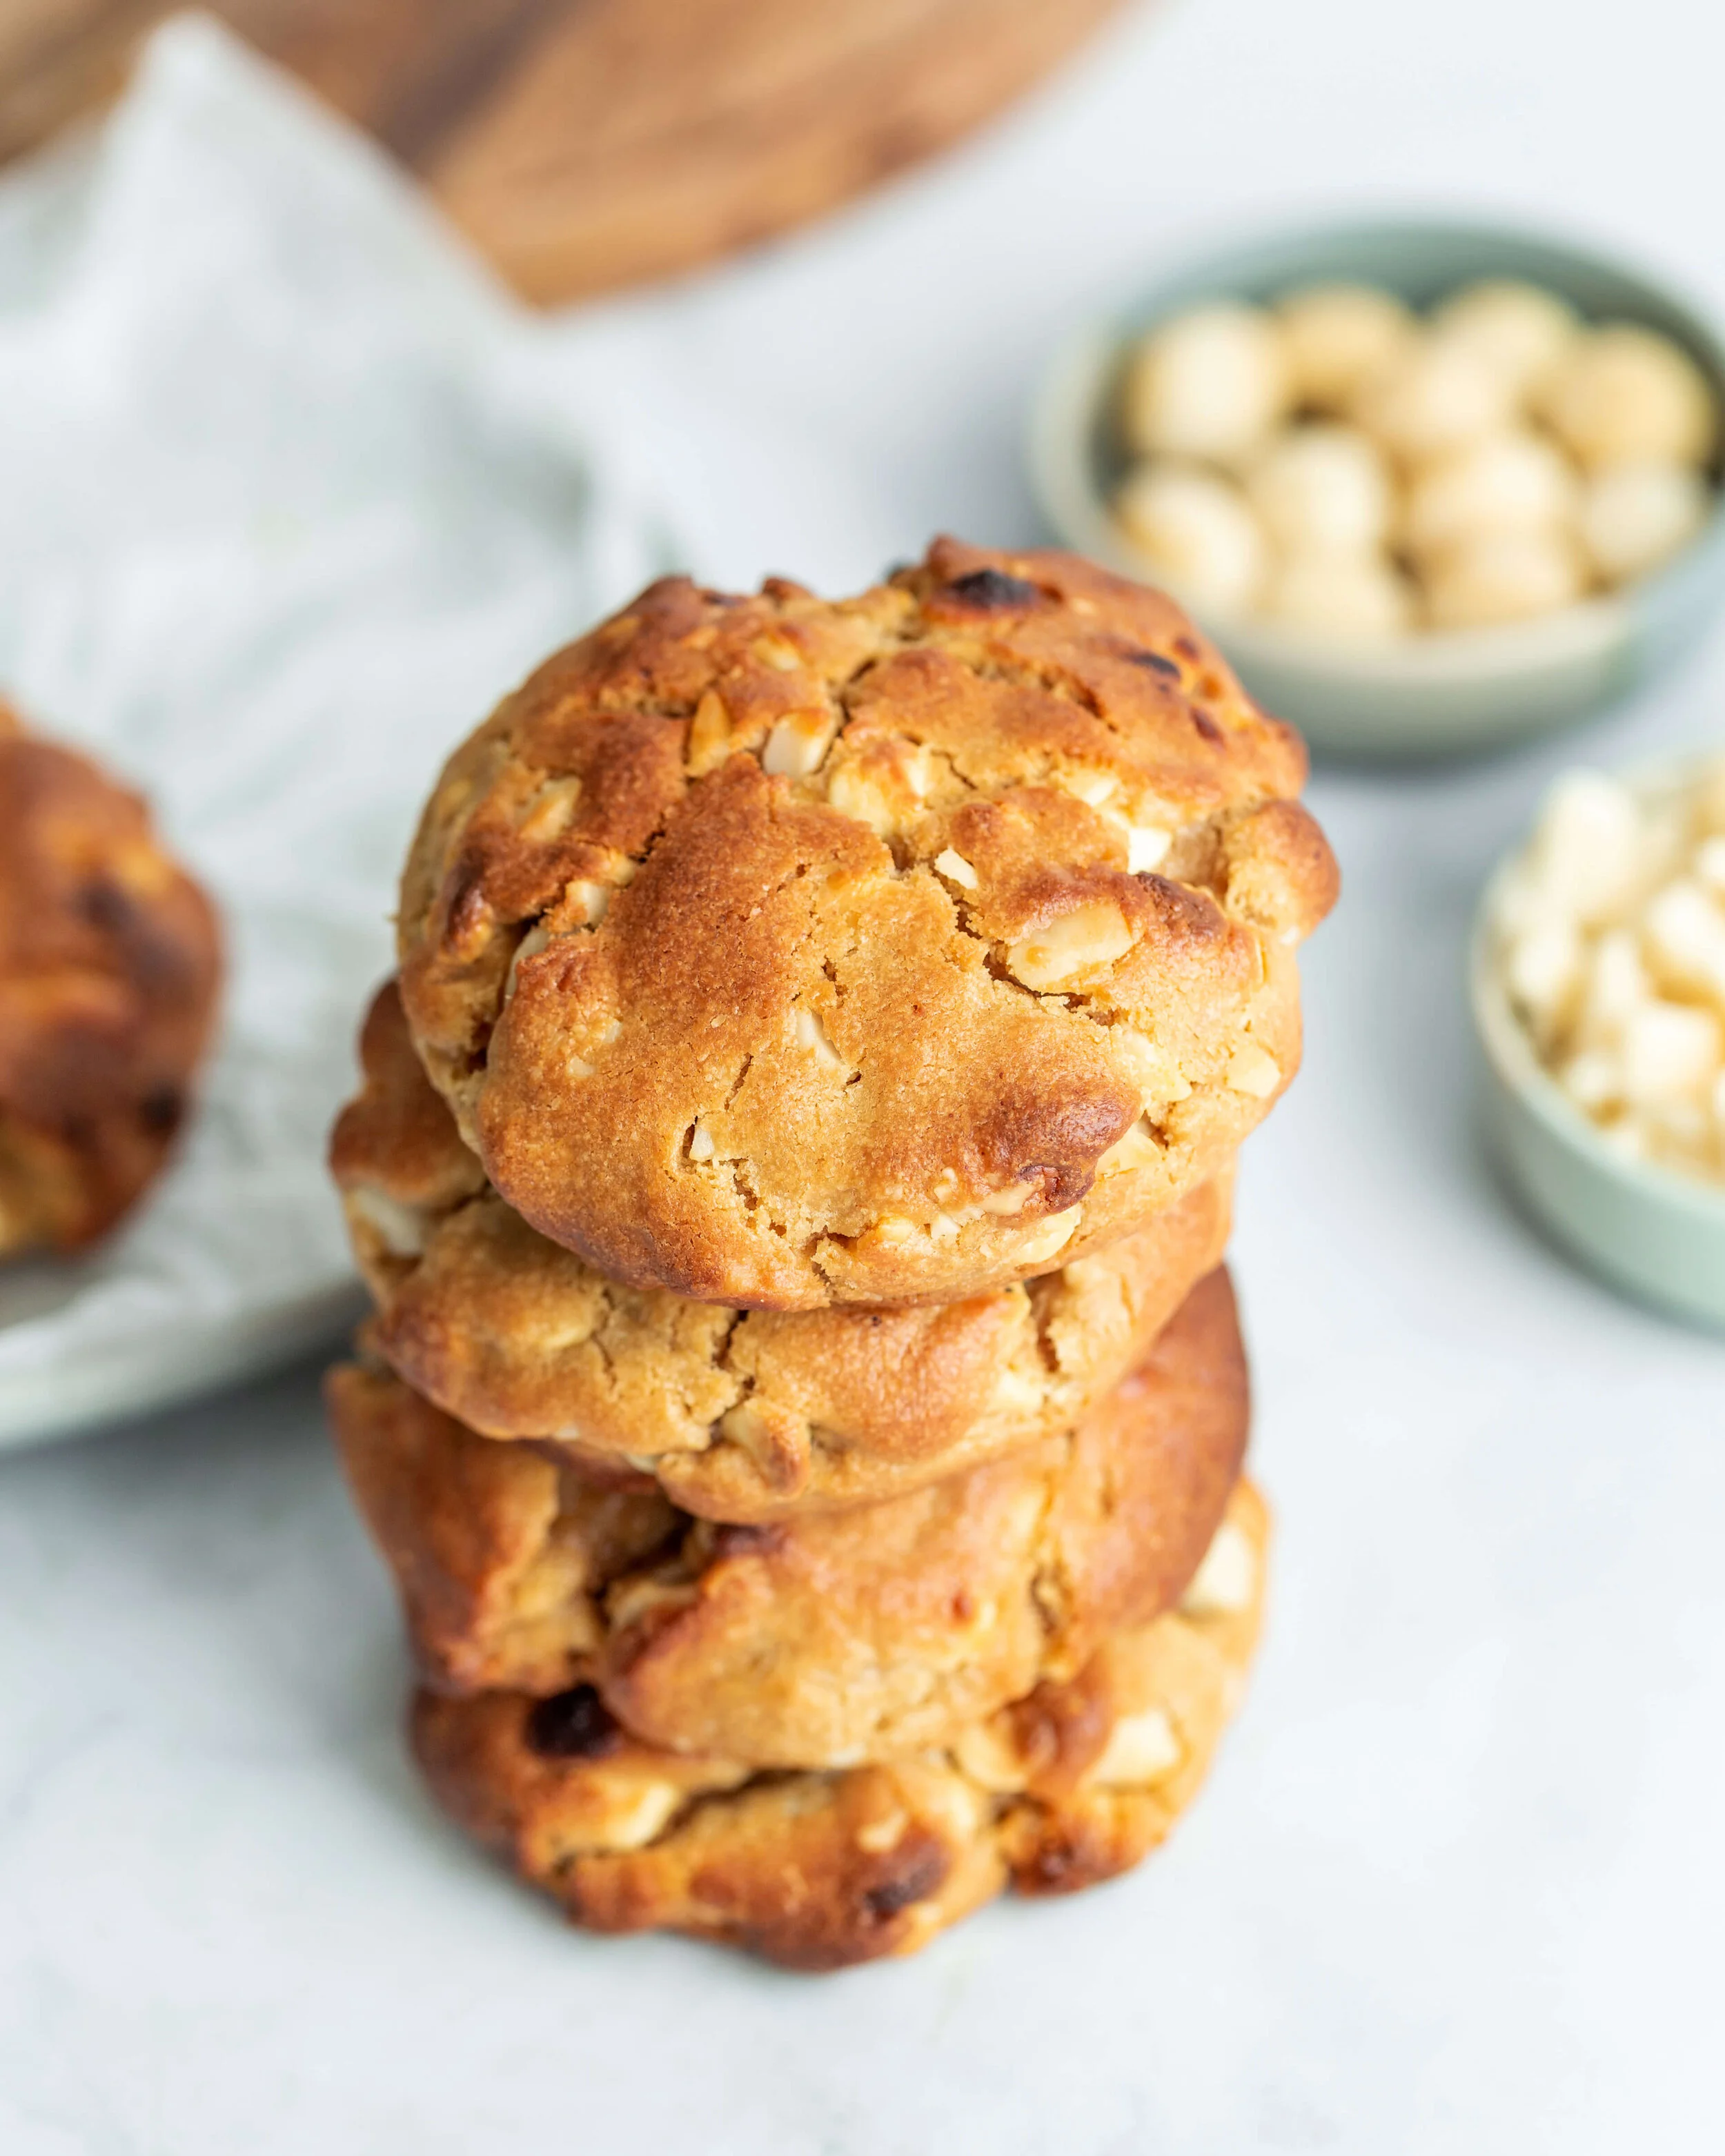
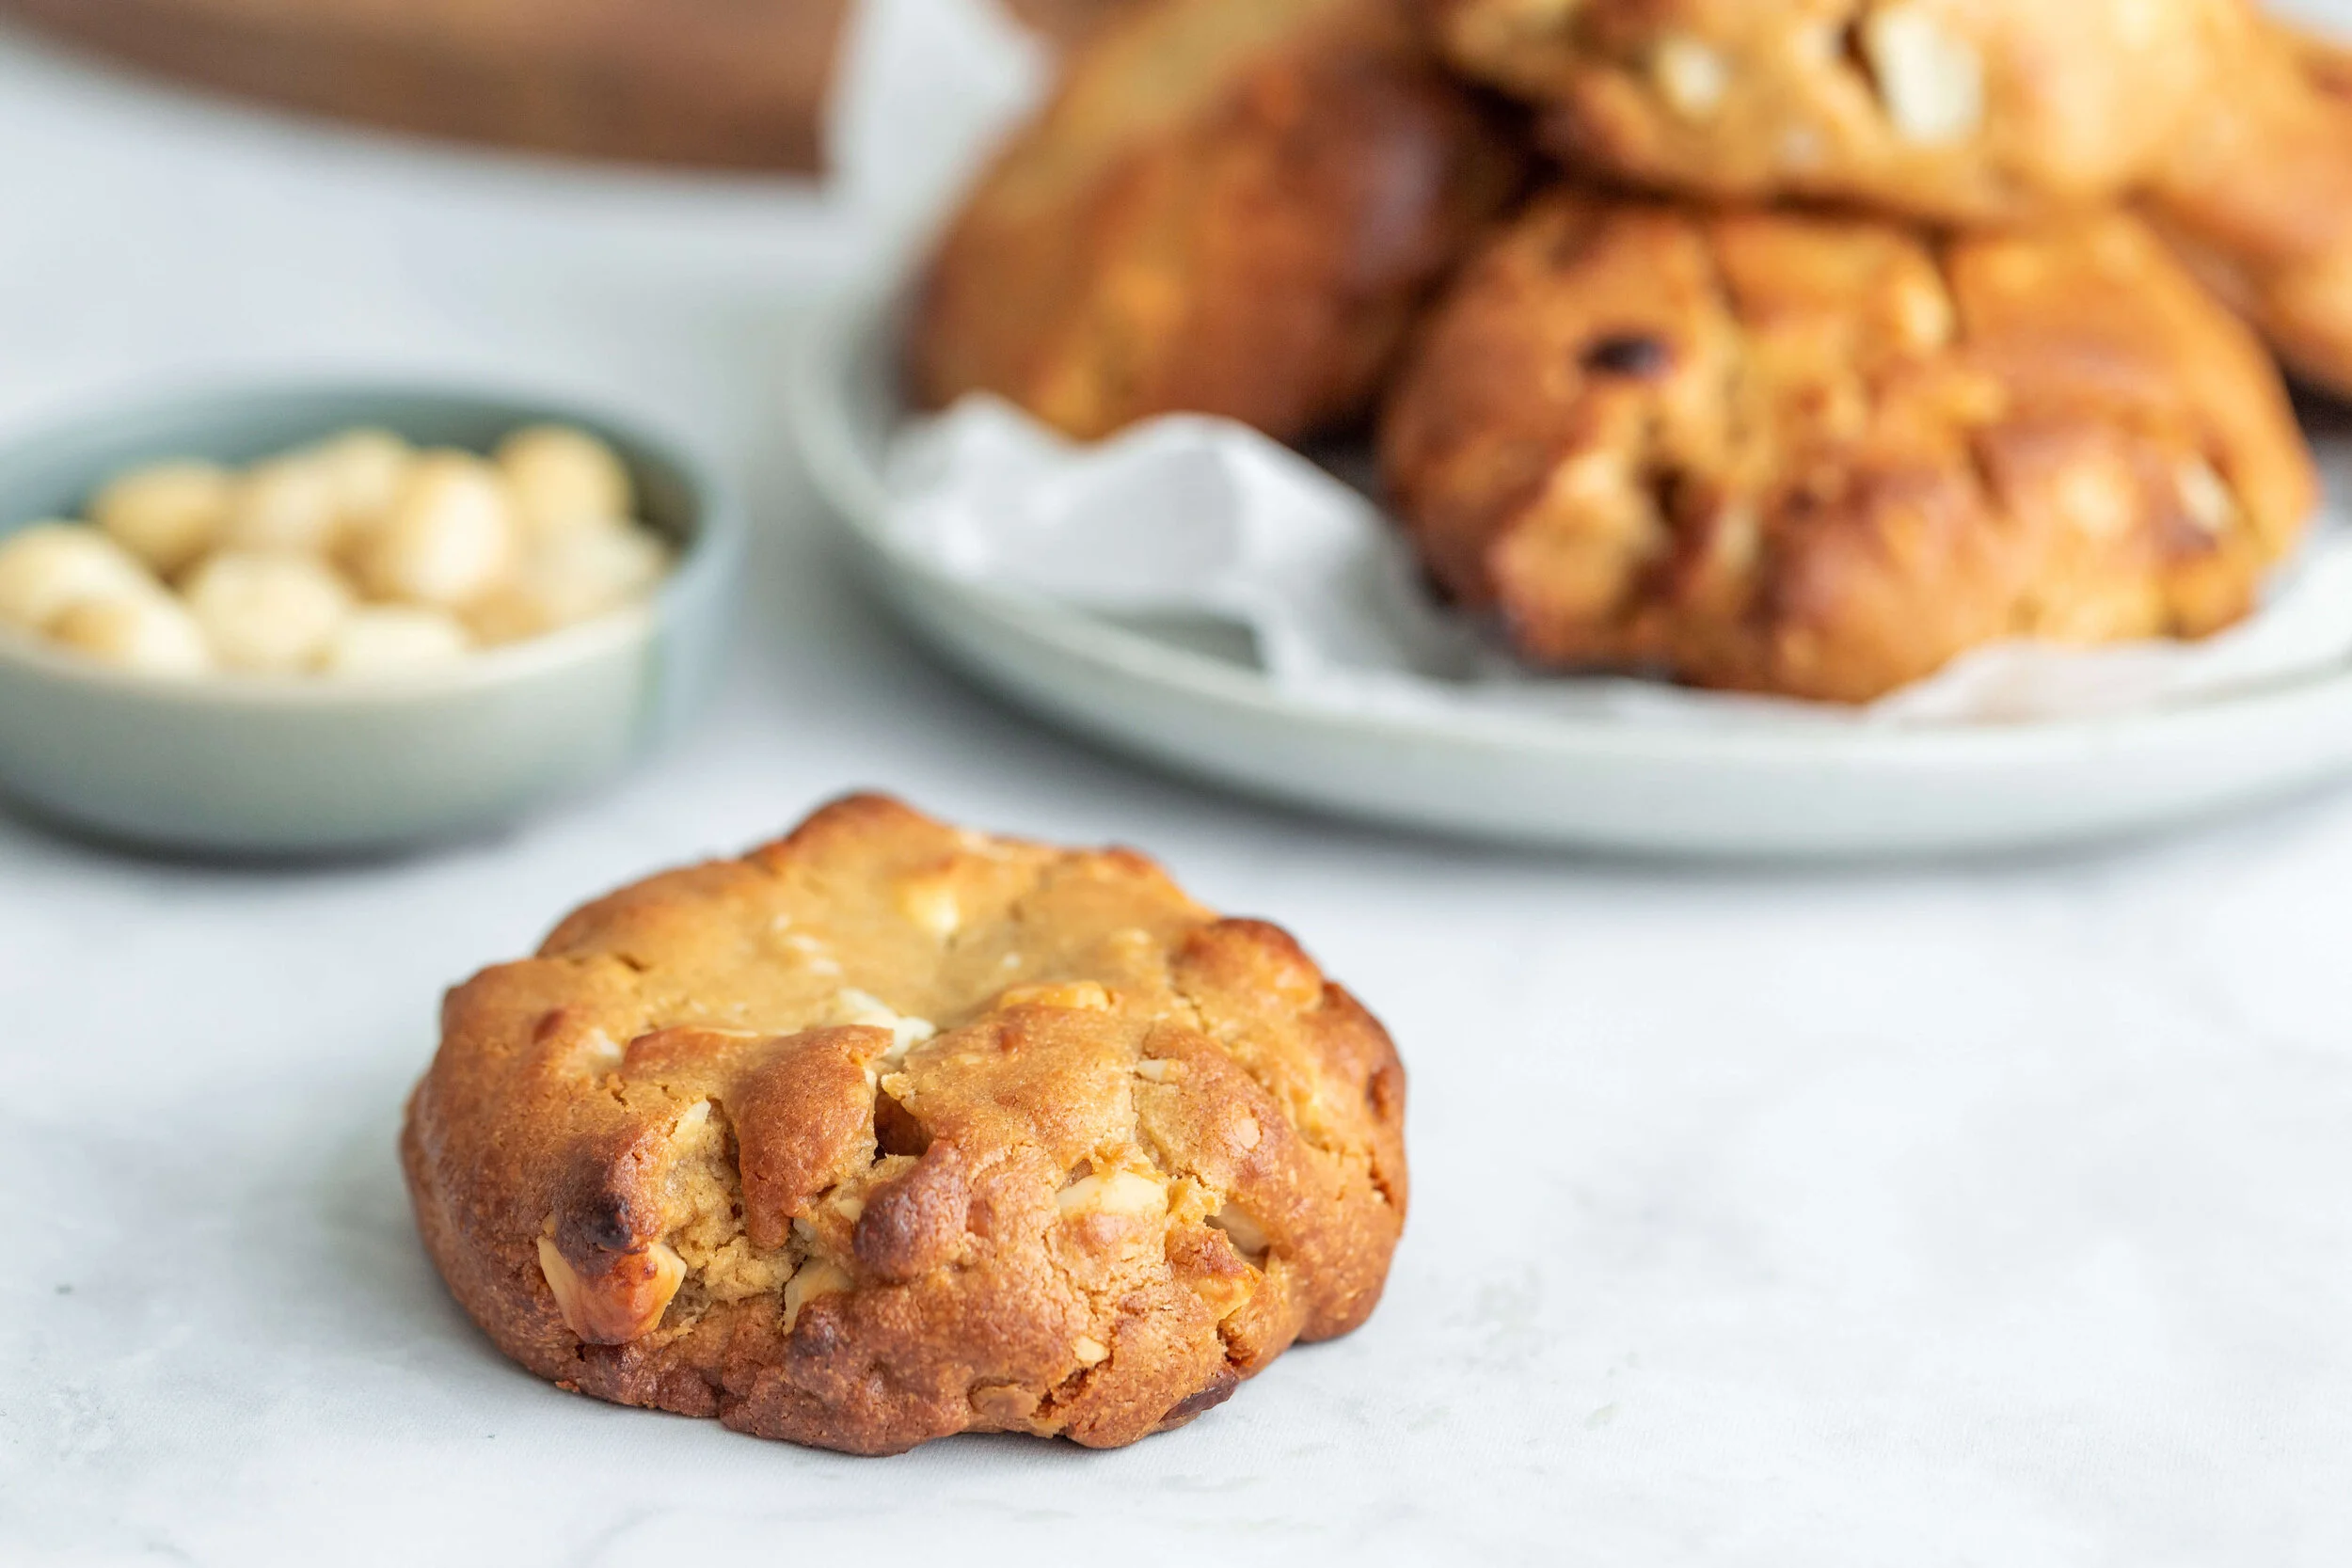
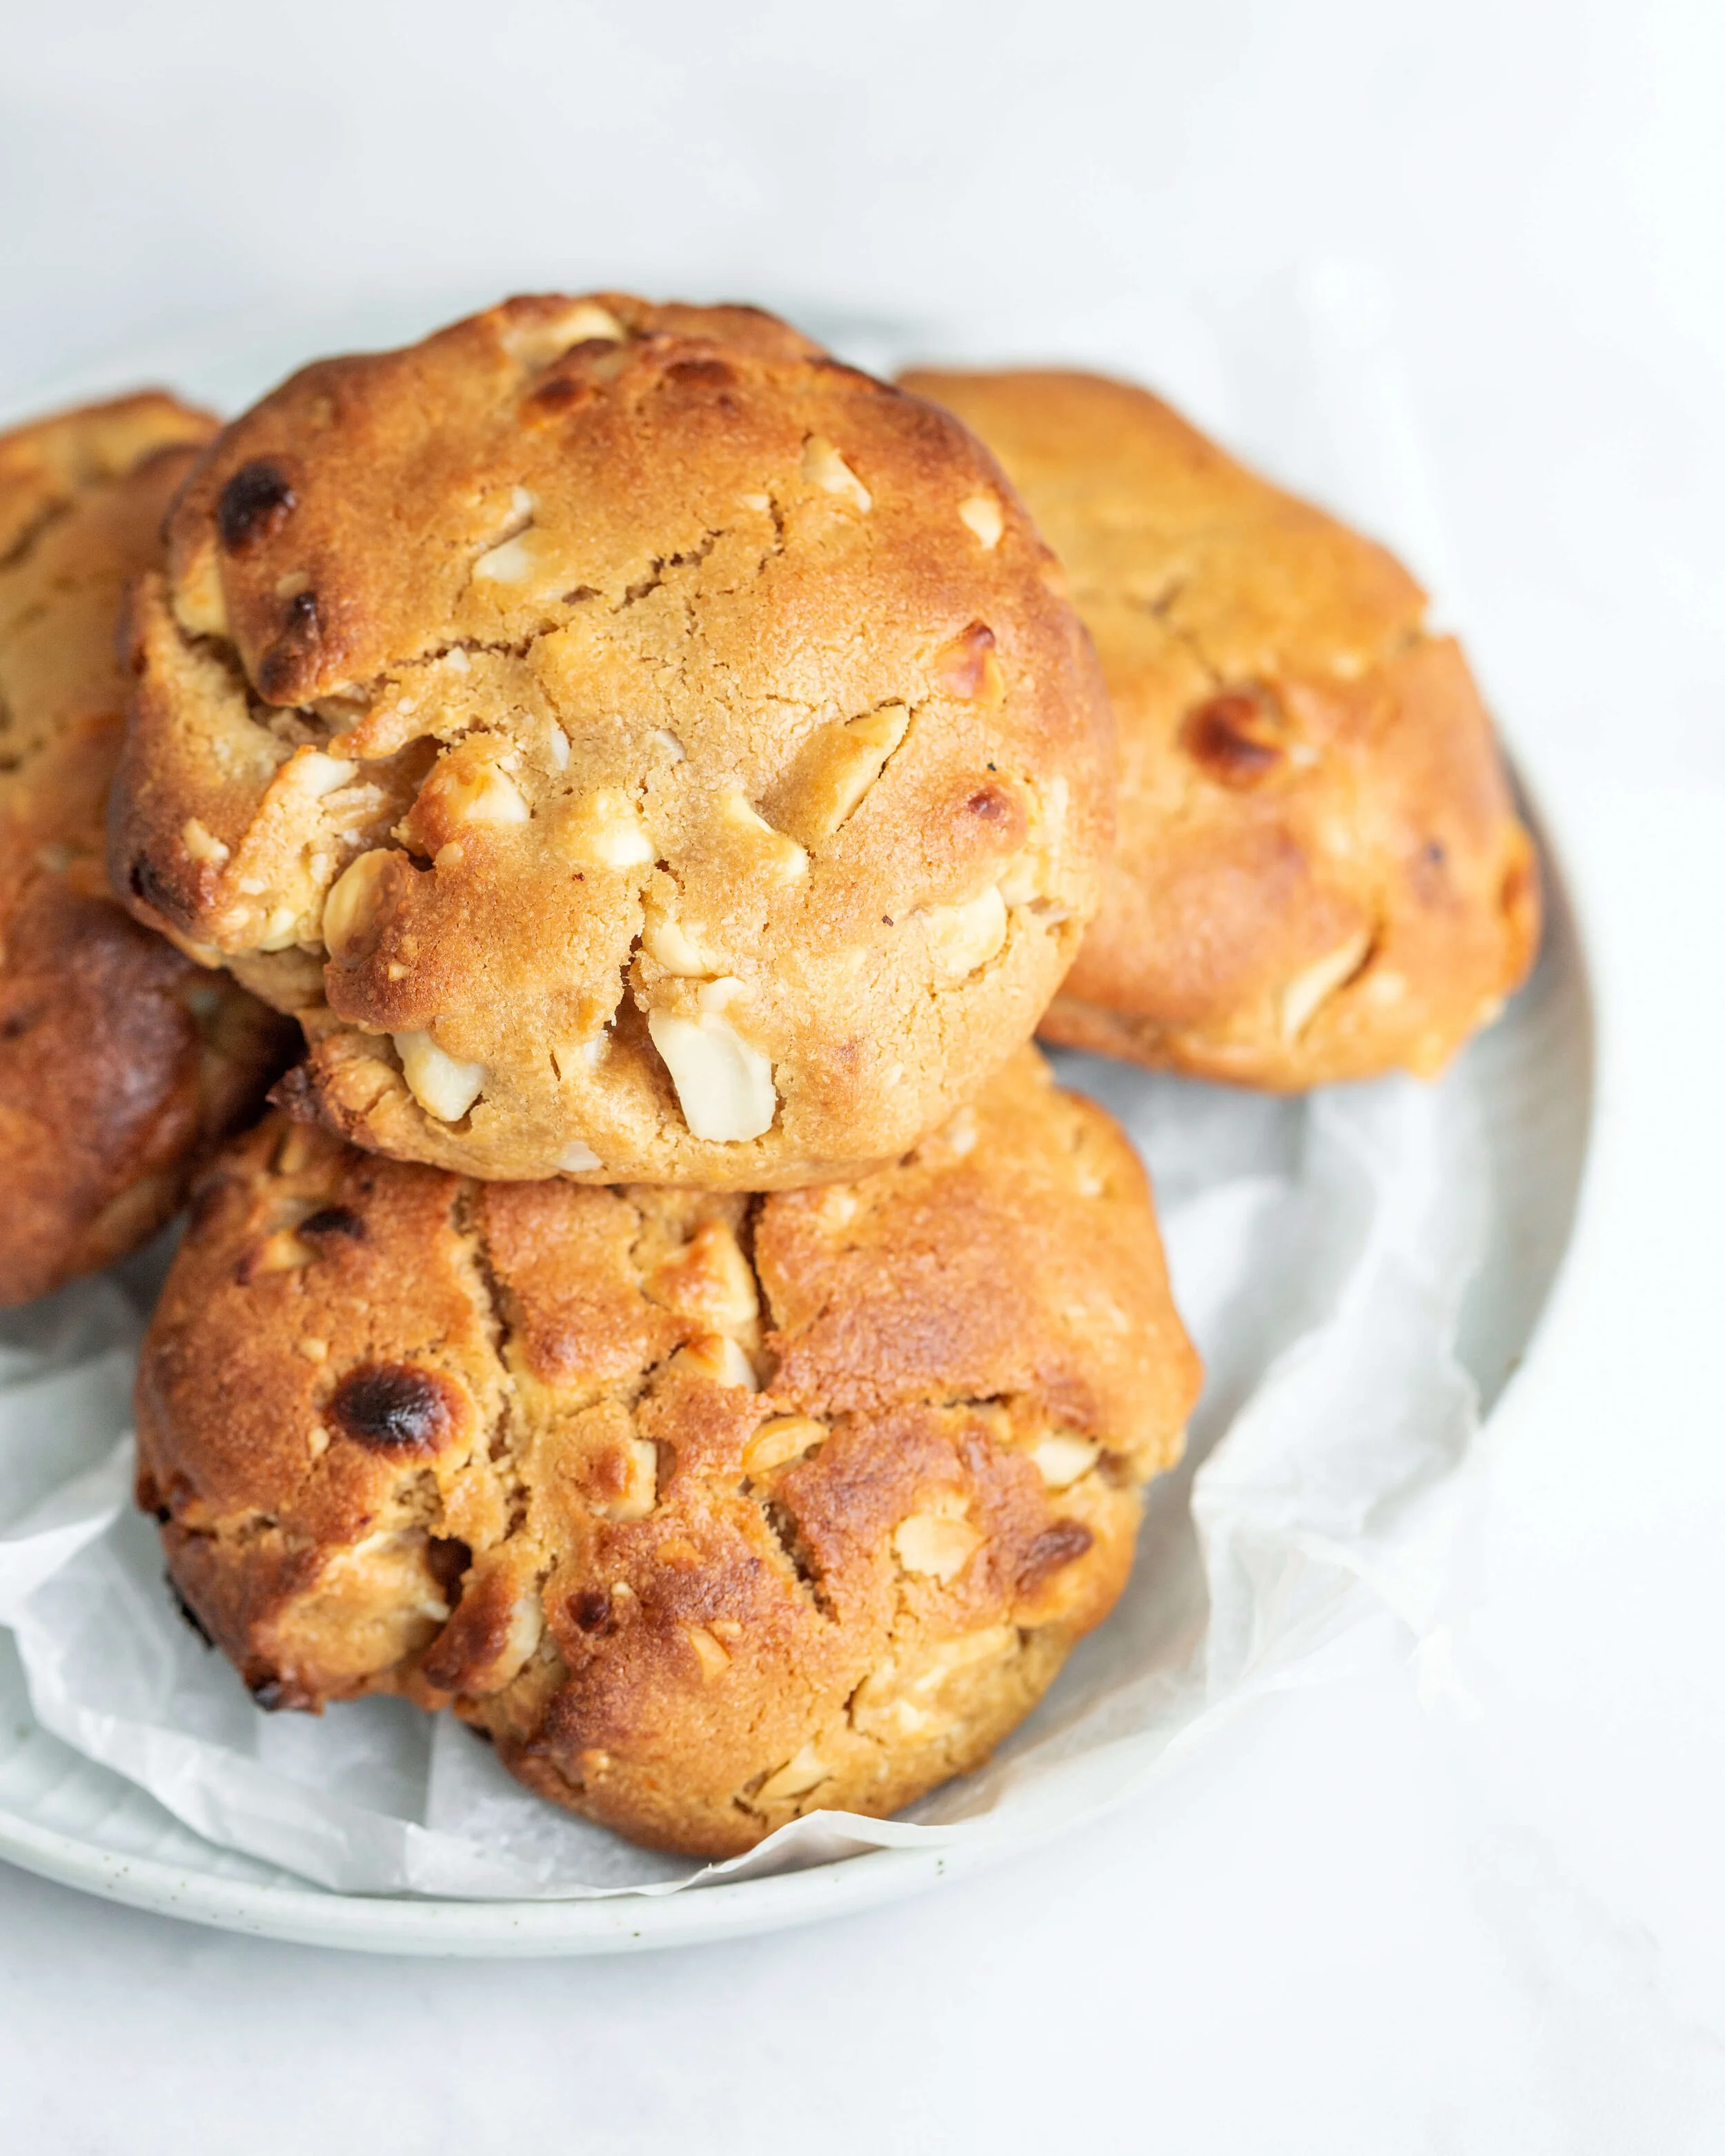
The Best NY Style Chunky White Chocolate Macadamia Cookie
I have an amazing peanut butter salted choc chunk cookie recipe - that I promise I’ll share with you some day soon - and I think it’s my all time favourite. Although Erin from Cloudy Kitchen’s Dark Choc Peanut Butter Stuffed Choc Chip Cookies are to die for too.
My partners favourite cookie is a white choc macadamia cookie - but I’ve tried so many recipes that always let me down. They’re thin, flat, oily, too crisp cookies that I just can’t get behind. So I’ve been doing some research and figured I could turn a NY style chunky cookie recipe into the ULTIMATE white choc macadamia cookie.
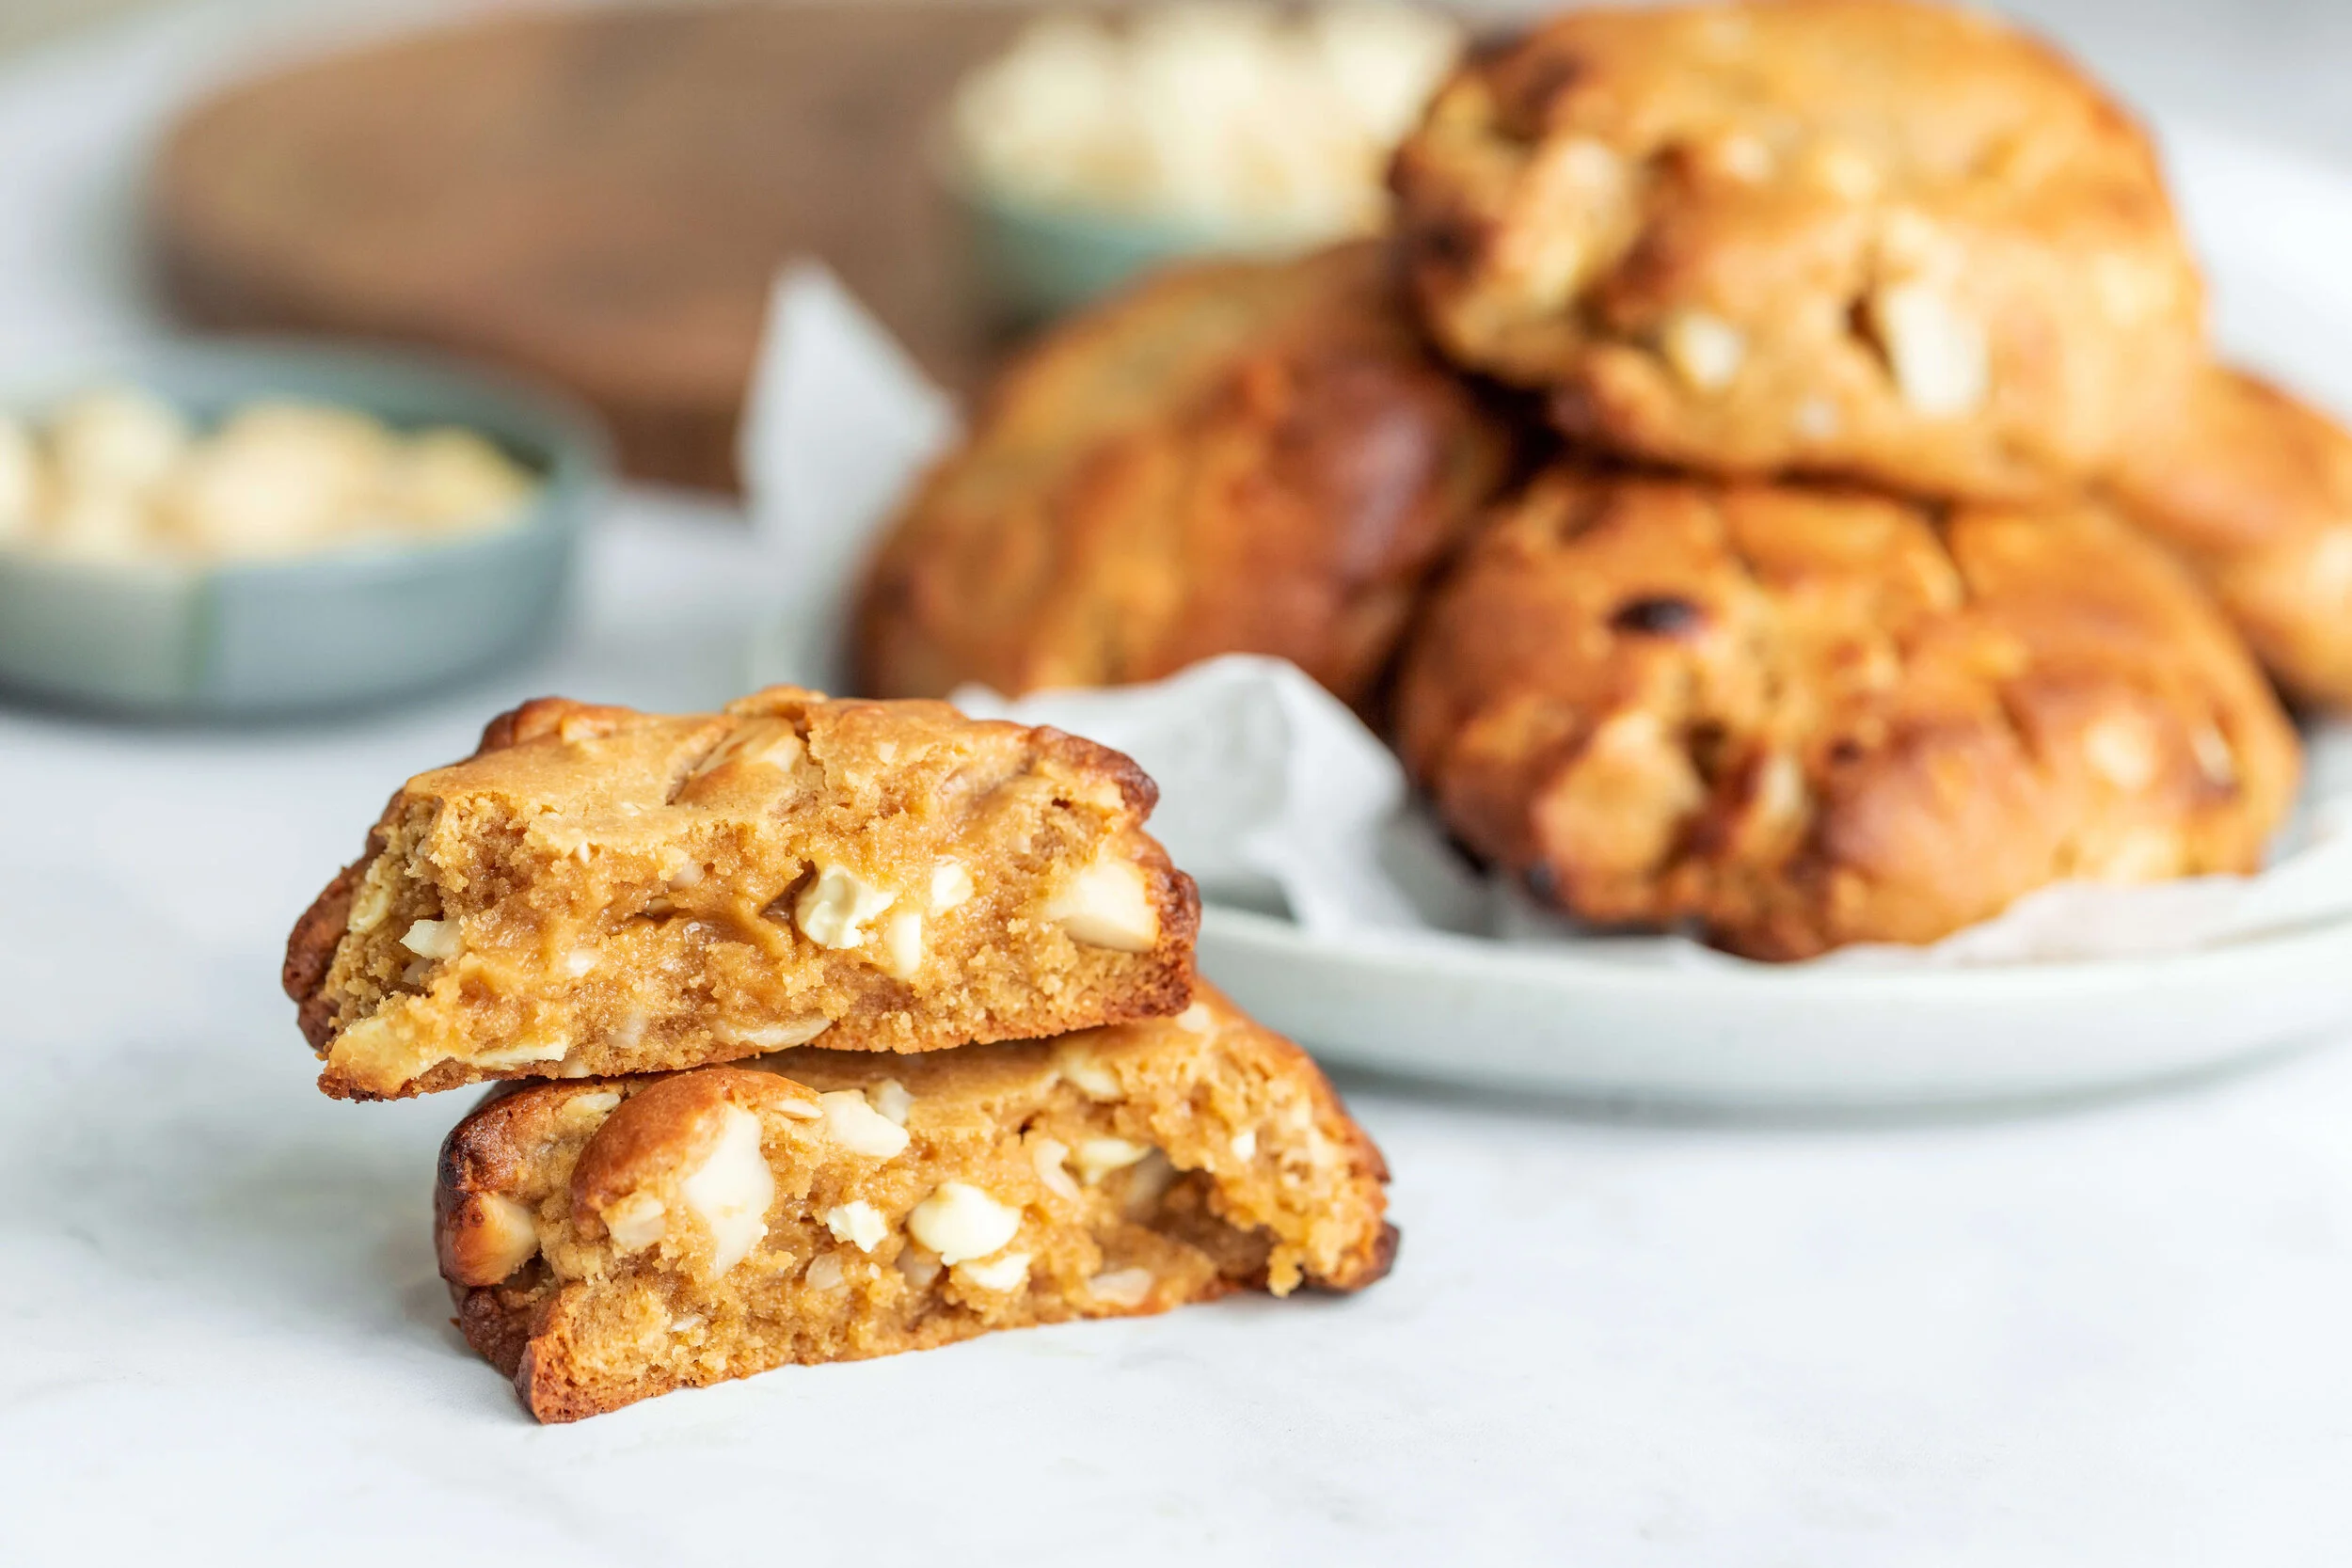
Although I looked at a few recipes - I based this one off of Joshua Weissman’s attempt at the New York Levain Chocolate Chip Walnut cookie. That B-roll shot at the end, breaking open the cookie, how could I not use this recipe!?
But my ultimate cookie research also lead me to a hot tip - using browned butter. Which I knew would totally take a white choc mac cookie to the next level! This is best done in a light-coloured pan if you have one, so you can see the butter browning, I don’t have one but basically just keep swirling the pan, it will start to foam, you’ll see the milk solids float at the top, it will get all bubbly and then start to come back together and you should start to see the solids browning at the bottom of the pan. As soon as you see it browning, remove it from the heat and keep swirling, it will keep browning for a few moments off the heat so taking it off makes sure it doesn’t burn. It should smell super buttery, nutty and rich. The butter loses it’s water content during cooking, so we add that back in, either as cold water or as ice cubes to really stop that cooking process.
I also added vanilla - you could leave this out if you don’t want to fork out for vanilla - but I’ll add vanilla to just about anything tbh. And lastly - chilling the dough. You want to chill for around 45 mins initially, before you scoop and then again for at least 30 mins after scooping. I baked some after about 2 hours chilling (mainly because I was busy during this time) and then baked the rest about 24 hours later. I’ve seen this recommended in some cookie recipes to aid in developing flavours (kinda like a marinade or proving method). But I didn’t notice too much difference in flavour. So if you can’t wait - 30 minutes will do - or if you’re an organised person you could prep a day ahead and bake fresh cookies when you need them (if more than a day ahead - pop them in the freezer and they’ll keep for a couple of months).
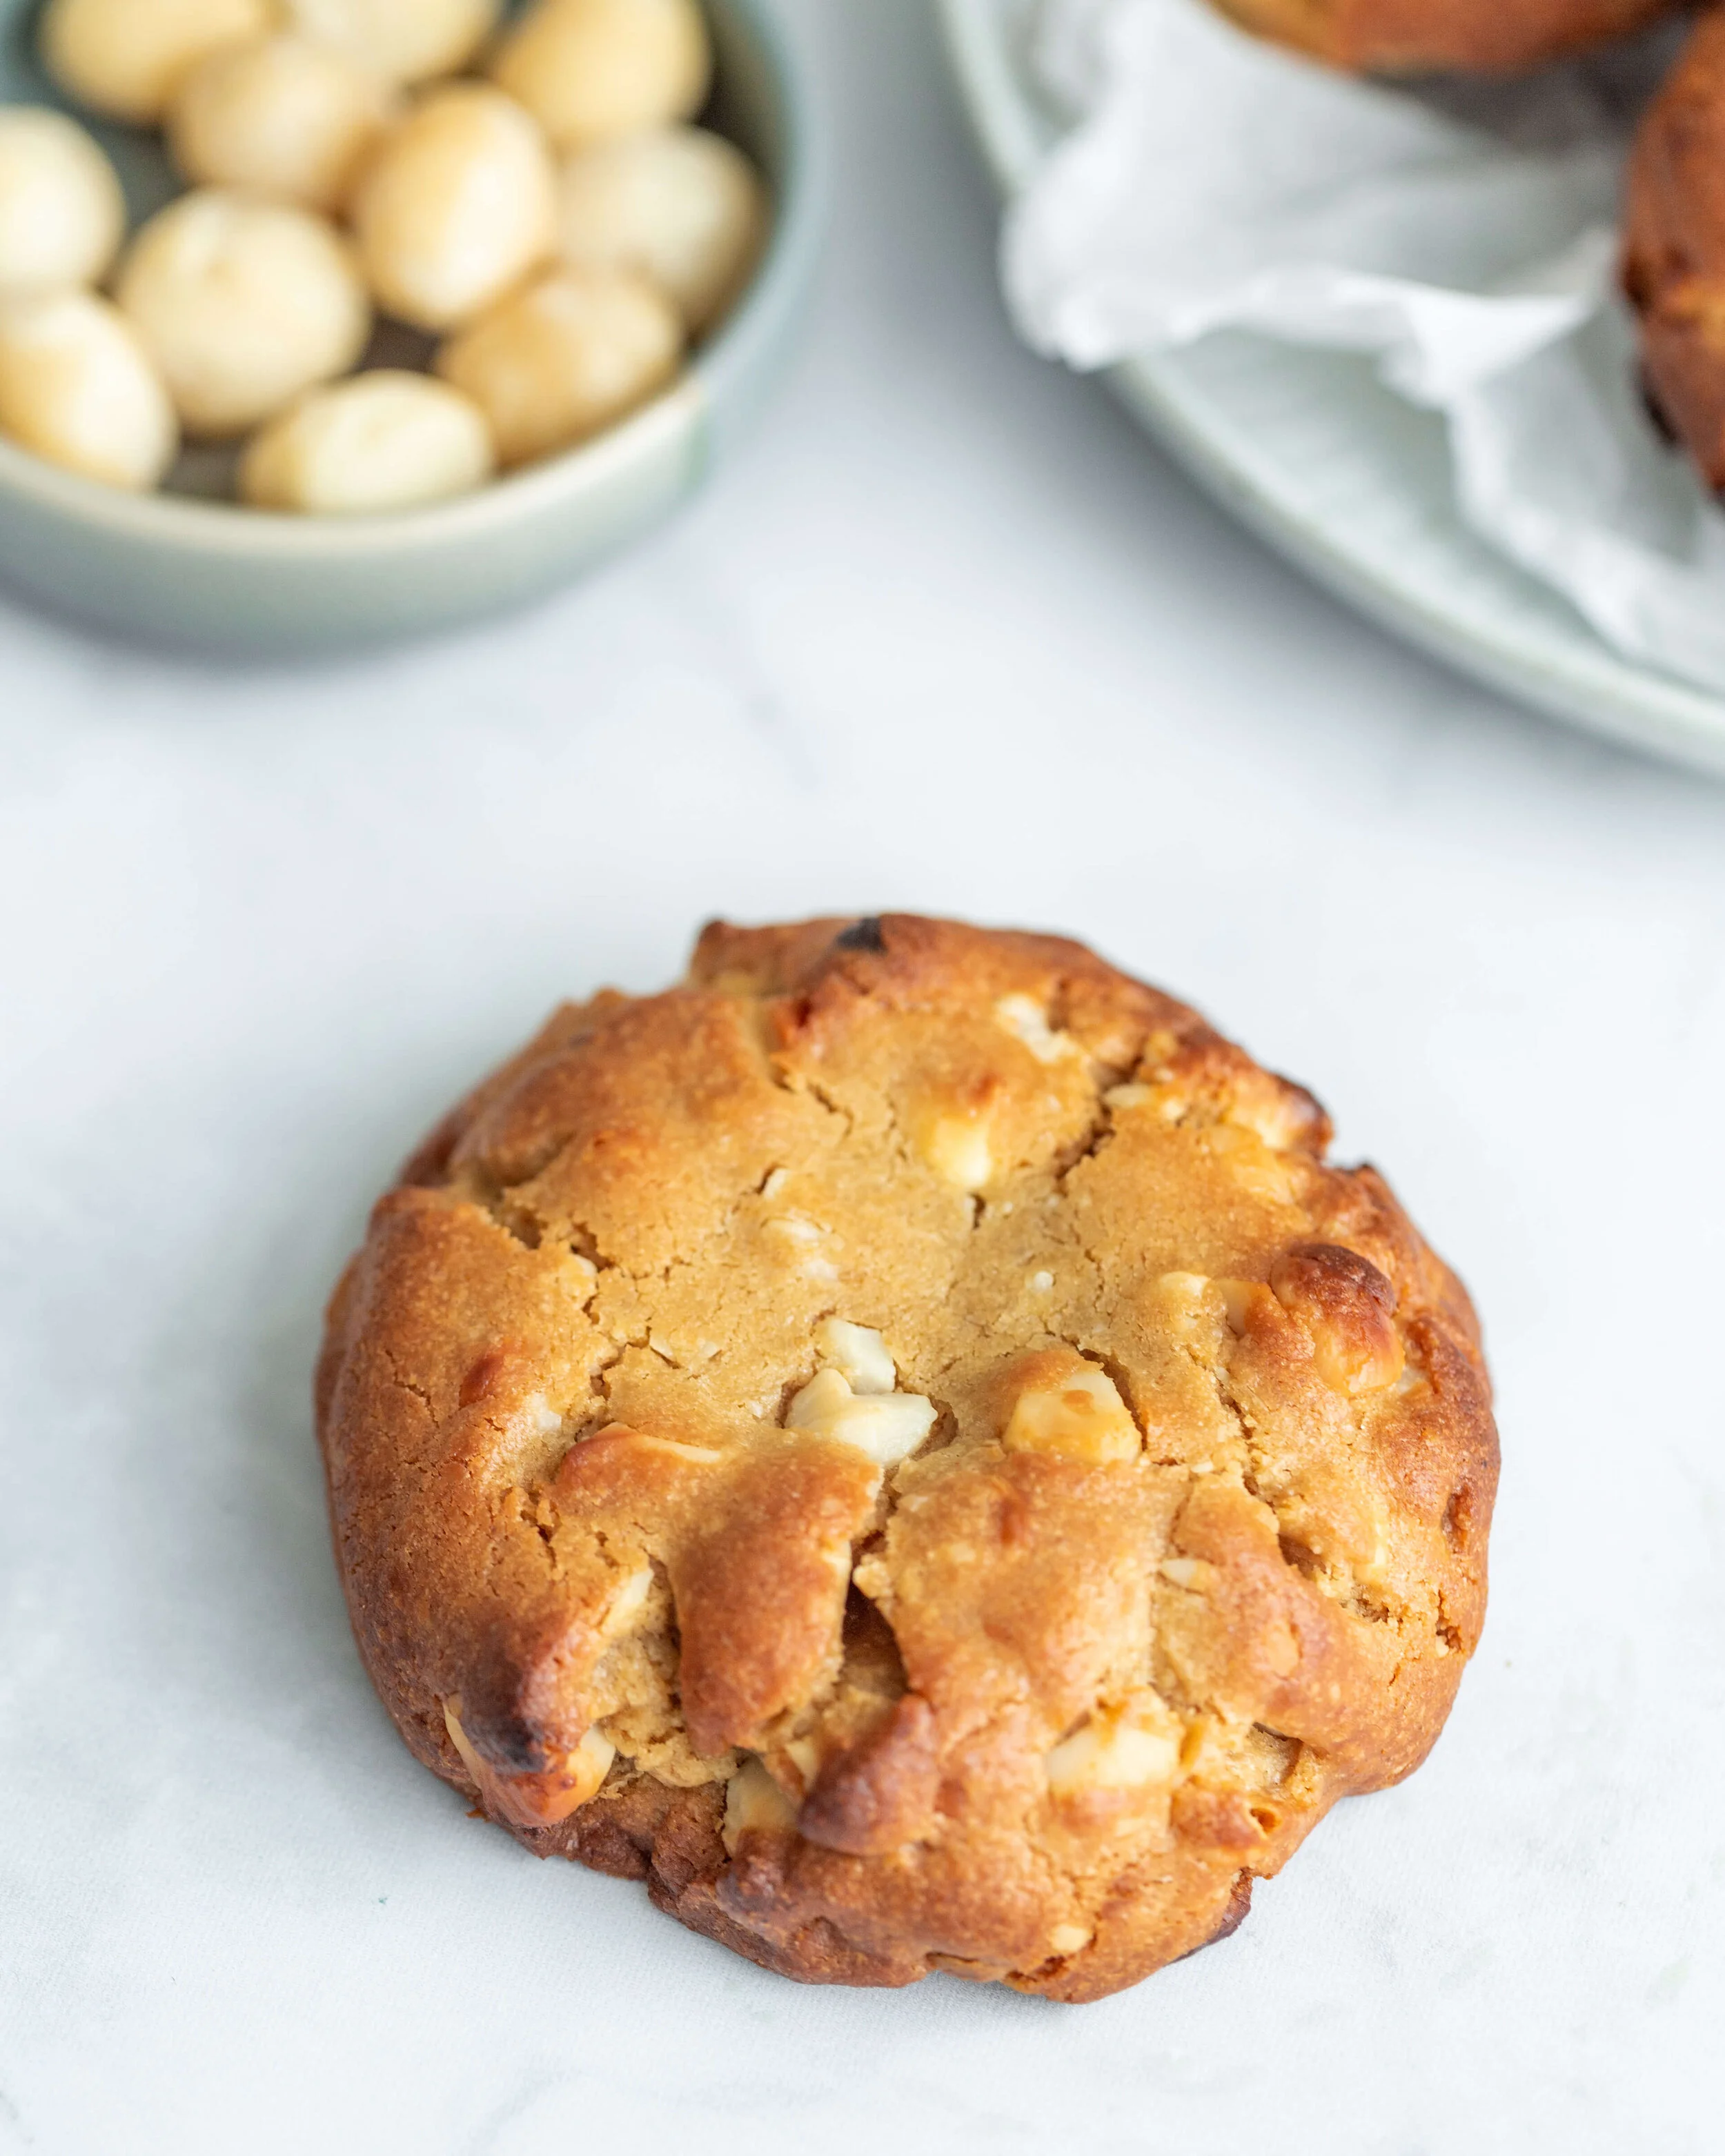
I already had white choc chips at home (although two different brands, and interestingly, one went all melty and the other didn’t). But you can use choc chips, or chop up a block to get a variation in choc chunk sizes. And use whatever kind of chocolate you fancy. Same goes for nuts - I bought some beautiful Australian macadamias and gave them a quick whiz in my food processor, but you could chop by hand if you like nice neat chunks. Or swap for walnuts, pecans, or omit the nuts altogether.
INGREDIENTS
230g cake flour
275g all purpose flour
1.5 tsp kosher salt
2 tsp corn starch
1/2 tsp baking soda
280g unsalted butter
2.5 tbs water (or 3 small ice blocks)
285g dark brown sugar
115g white granulated sugar
2 eggs
3 egg yolks
400g chopped white chocolate (or chocolate of your choice)
140g chopped macadamias (or nuts of your choice - or omit altogether)
1 tsp vanilla
METHOD
Melt butter in a sauce pan, continue cooking, swirling pan constantly until butter is dark golden brown and has nutty aroma, 1 to 3 minutes. Remove skillet from heat and add water/iceblocks, set aside to cool slightly
Whisk together both flours, salt, corn starch, and baking soda in a medium sized bowl
In a stand mixer with the whisk attachment, combine both sugars on medium speed
Slowly stream in the butter until mixture is creamy
Add 2 eggs then 3 egg yolks, one at a time until each is incorporated, then add vanilla.
Switch to paddle attachment then mix in dry ingredient mixture
Using a rubber spatula add in chocolate and nuts
Put cookie dough in a bowl, cover, and let rest in fridge for at least 45 minutes
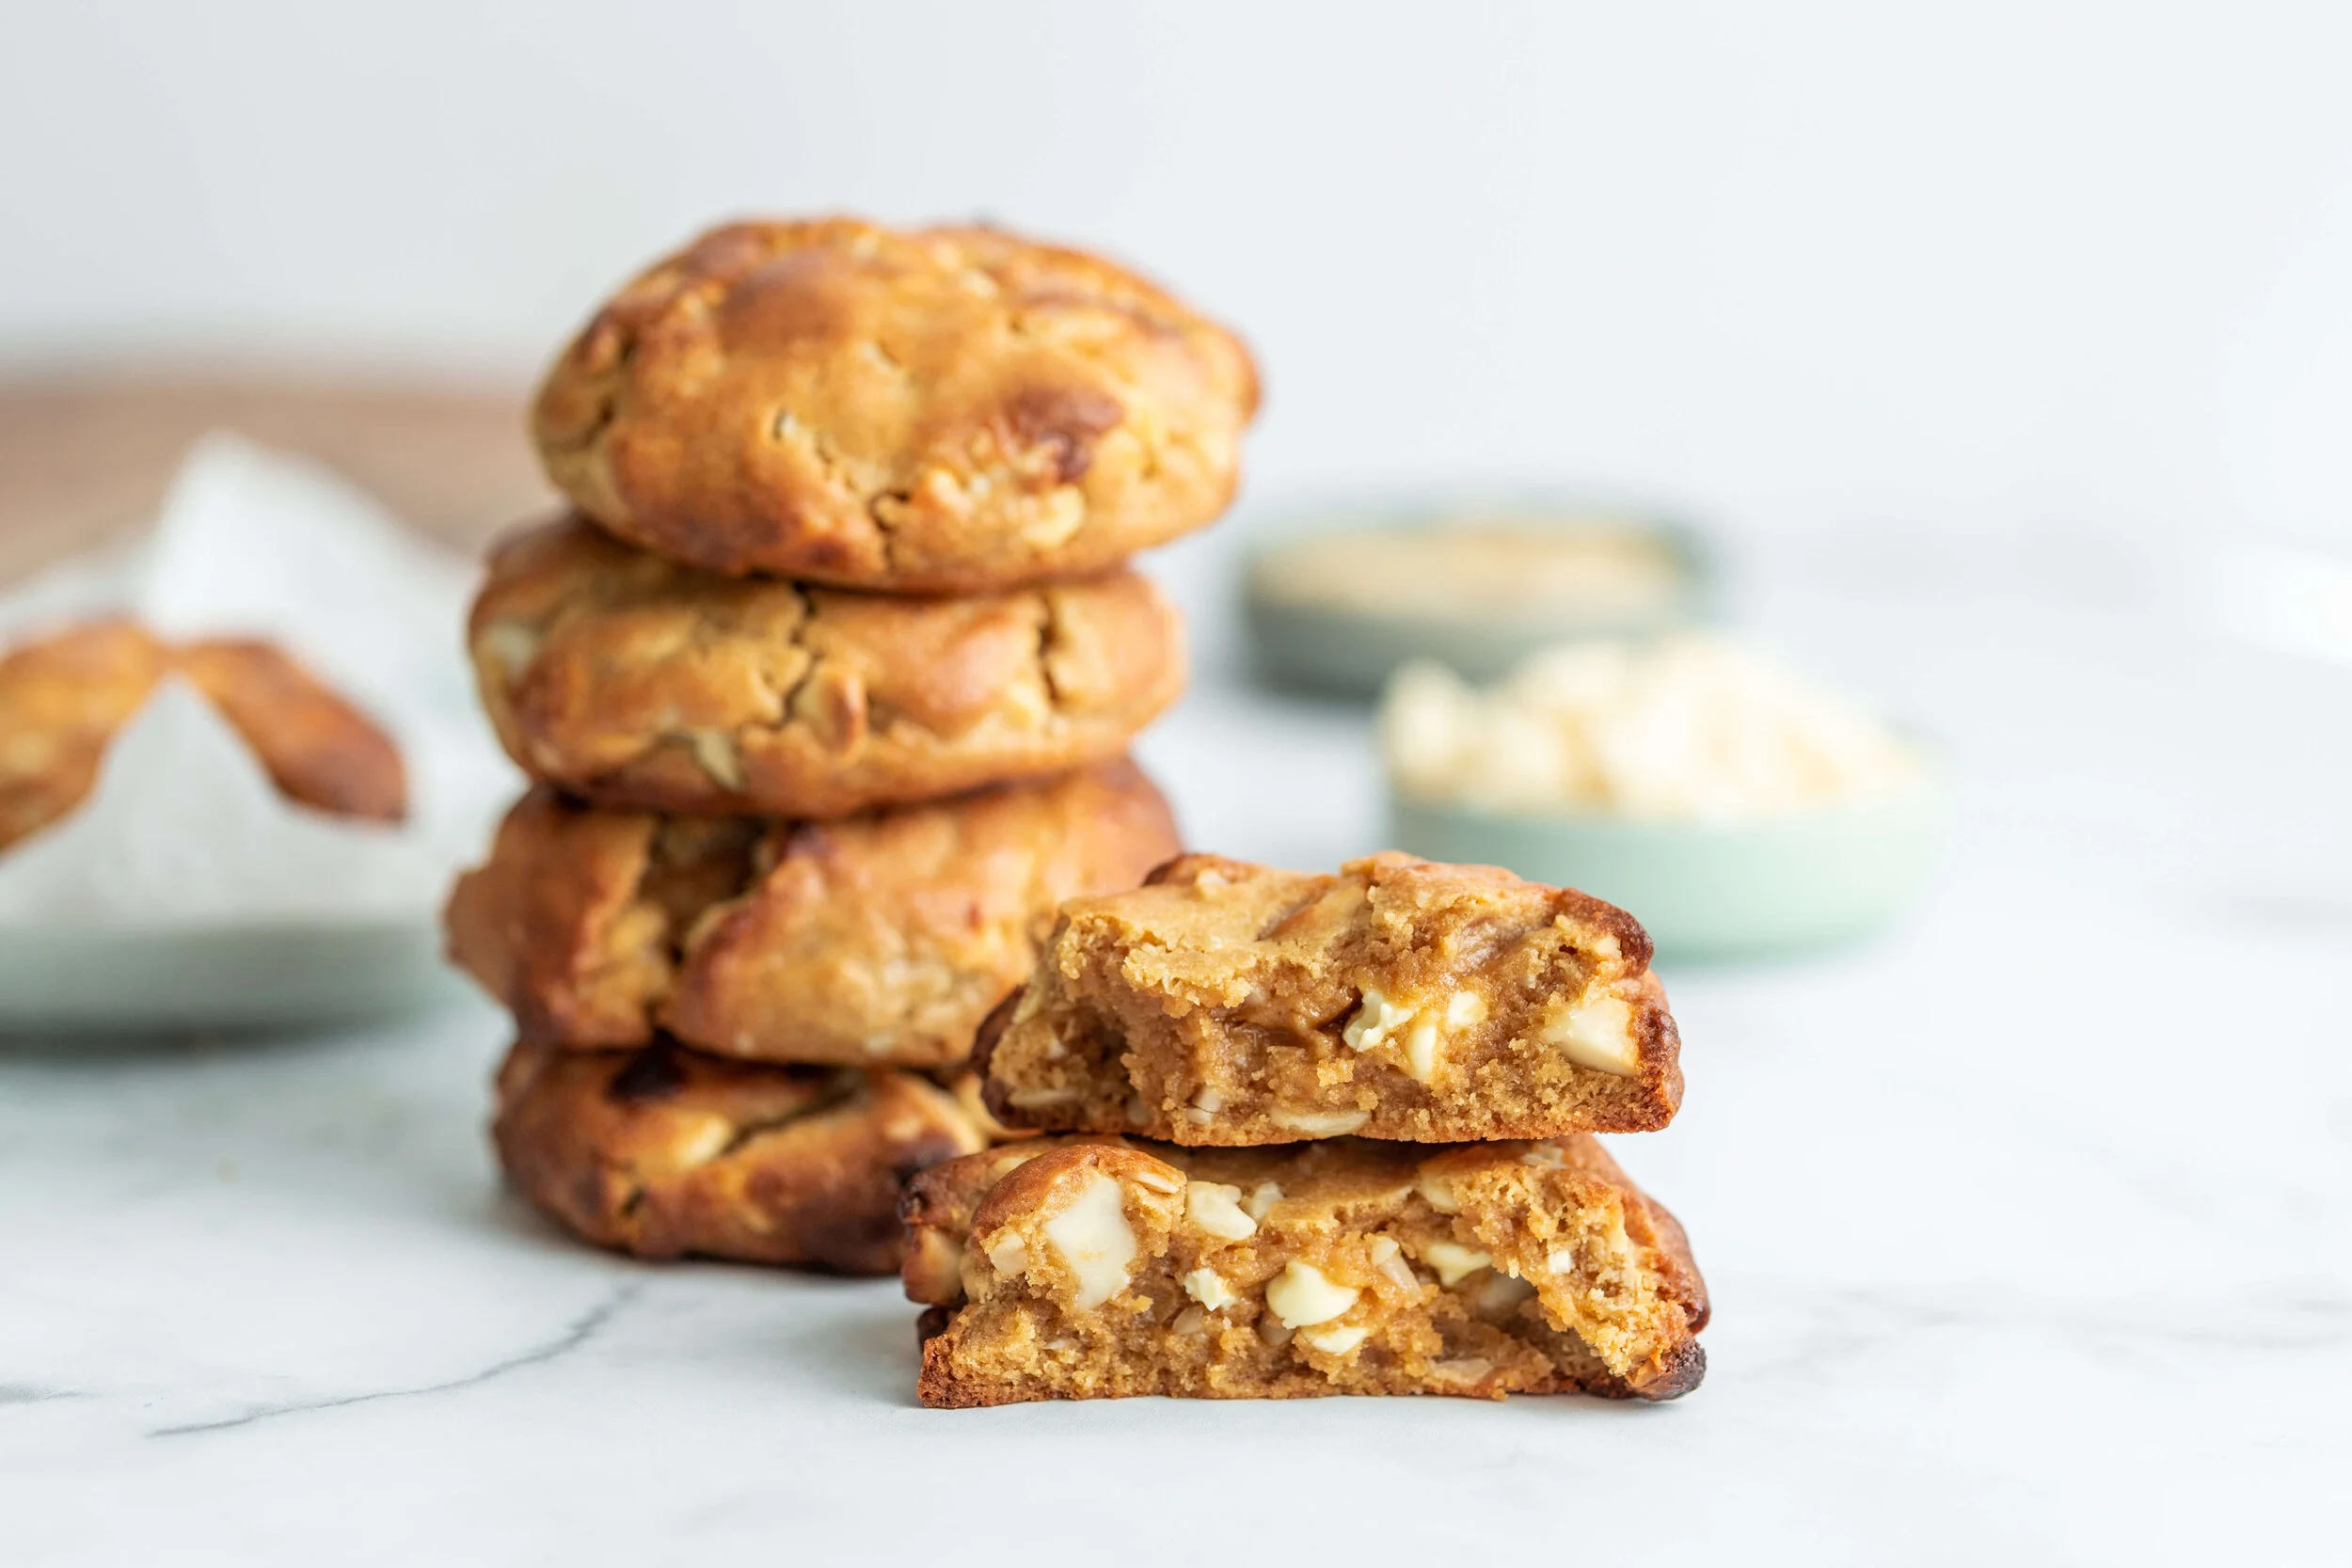
Divide into roughly 155g balls and arrange onto baking sheets, if you want a really soft centre and a tall cookie leave as balls, if you want a slightly soft centre and a slightly flatter cookie you can push these down just a touch (this is what I did for the second batch and they’re a wider, flatter cookie) - this should yield 12 cookies, though this may be less if you’ve omitted nuts.
Refrigerate baking sheets with cookie dough's for at least 30 minutes or up to 24 hours (or alternatively freeze until needed).
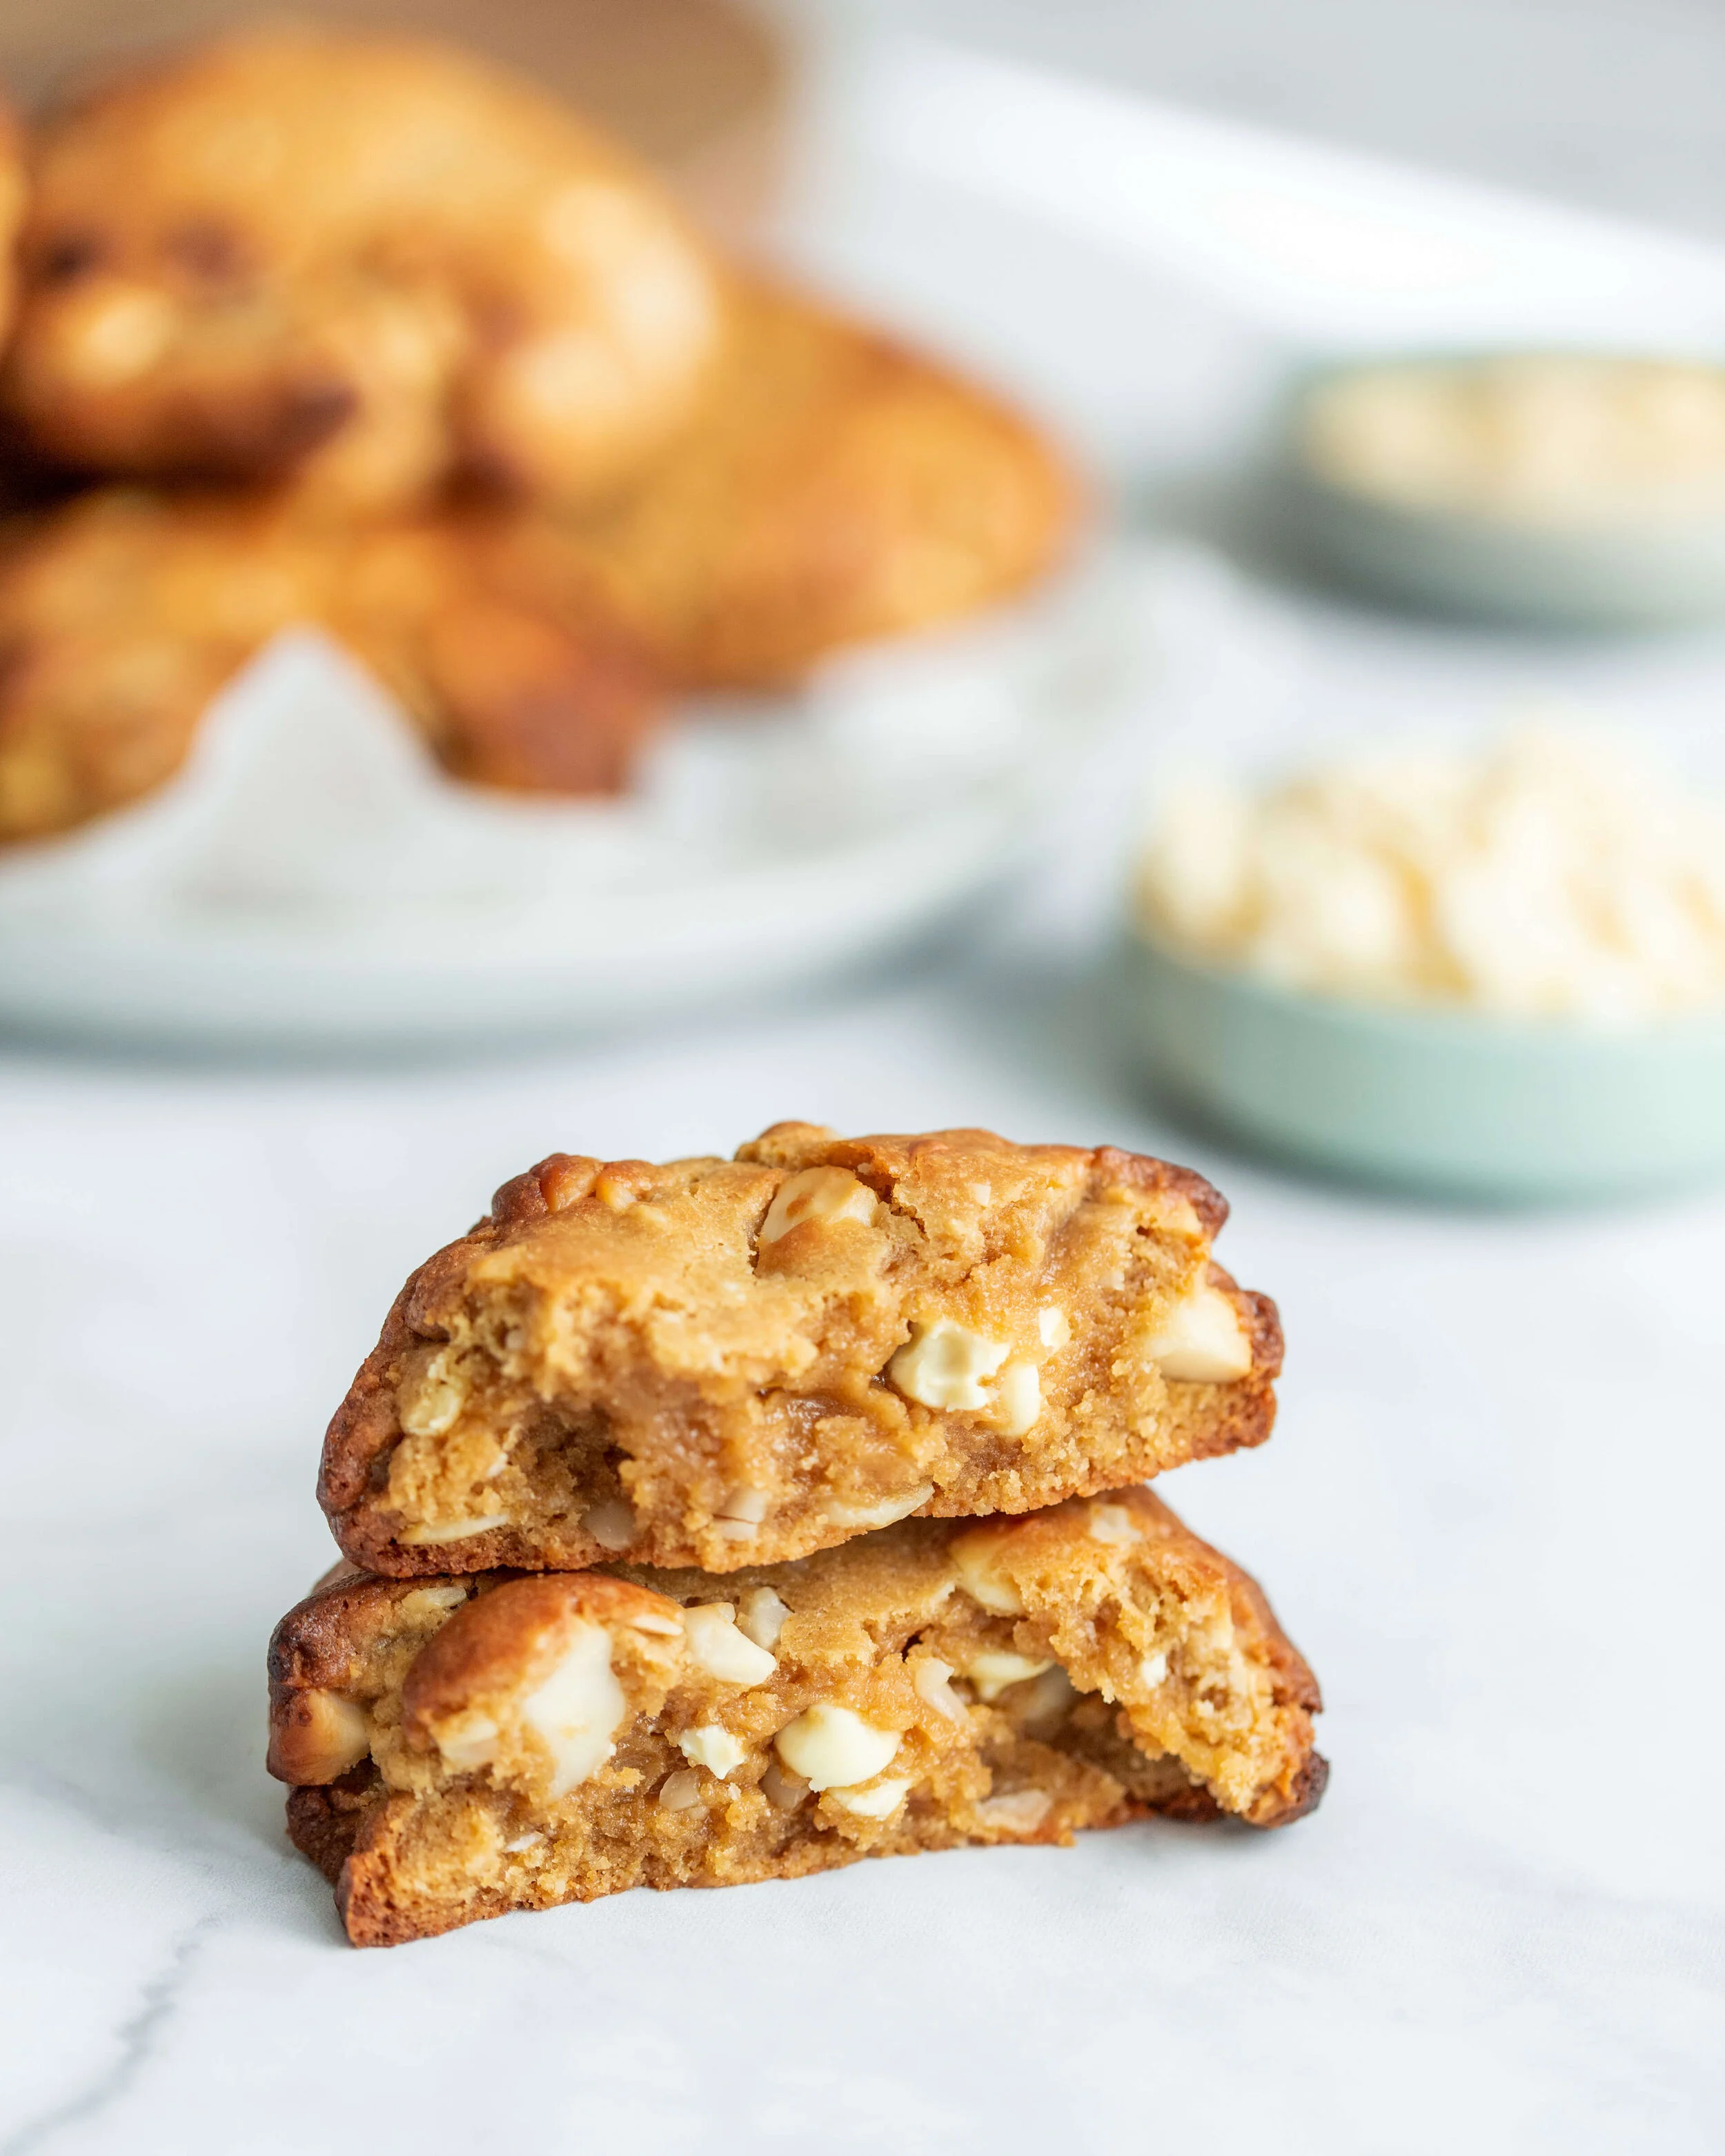
Place a baking sheet in the oven and preheat to 200 C. Heating the baking sheet ensures a crunchy bottom on your cookie. Remove tray, cover with baking paper and arrange cookies with about 5cm spacing, (this may only allow for 4-6 at a time, depending on the size of your baking sheet, so do them in batches, don’t use two racks of the oven as they’re likely not to cook as evenly). Bake for 10-15 minutes, or until brown on the outside. The inside will be soft and chewy, and the outside will be crisp and crunchy!
These are best served warm, so leave them to cool slightly before eating.